
This isn't a complete how-to, but its a quick writeup that should get someone 95% there.
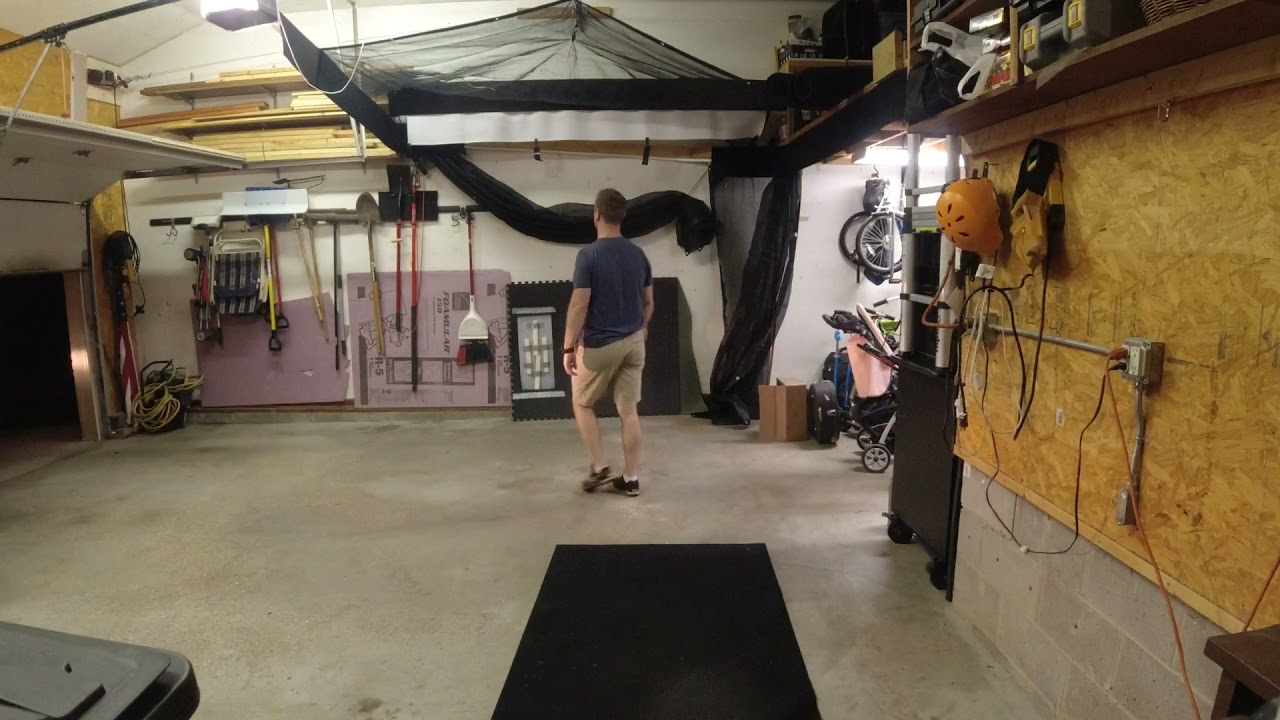
Here are images: https://photos.app.goo.gl/dURjuK9ZwEsmMu1P8
Screen, Motor, adapters, brackets:
It was way cheaper and just about as easy to make my own screen instead of ordering a sportscreen.
- Motor, remote, mounts $168.50 shipped: https://www.avoutlet.com/window-trea...ade-motor-kit/
- Options I added and are needed: a Remote, Charger: AM35-ES-PS, Rollease Bracket Adapter: 9012258 , 2" Rollease Tube Adapter: MTCRDR-35-2 , Add Brackets: Add RB380, Add Tube End Plug: RA2 & REP53 2", Shade Tape
- triple layer 10x10': https://onestopsimshop.com/collections/impact-screens
- 2" x 10ft EMT https://www.menards.com/main/electri...4446524507.htm
- splicing tape (basically 30mil thick rubber, its not even sticky) as a spacer since the motor parts are made for slightly smaller tube: https://www.menards.com/main/paint/a...4431020154.htm
Random stuff:
- Automarine carpet (velcro sticks to this): https://www.menards.com/main/floorin...4430622308.htm
- mesh tarp for sides and top: https://www.menards.com/main/tools/a...3586782&ipos=1
- velcro: https://www.menards.com/main/paint/a...4445732020.htm
- side rails: https://www.amazon.com/dp/B08P8HHZQZ...roduct_details
- side clips (take off the big ring): https://www.menards.com/main/window-...2425858&ipos=6
- shelf brackets with 2x4s to hold up the screen: https://www.menards.com/main/storage...6976478&ipos=2
Attaching the motor to the EMT:
- attach the plastic motor adapters to the motor brackets (crown and drive adapter MTCRDR-35-2) and end adapter
- Add splicing tape (about 3 layer) and duct tape to hold the splicing tape to the adapters
- measure how long the motor is on the EMT, mark the emt pipe
- Drill a hole in the emt
- insert motor into emt
- drill pilot hole through emt into drive adapter
- Add set screw through emt into drive adapter
Attaching the screen to the emt
- EMT pipe has a line down the side from when it was created, use it as your guide to apply the screen (double sided) tape.
- I ended up adding 3 rows of tape (not shown in pictures)
- Attach the fabric to the tape, then add a layer of duct tape as well. This should hold as long as you leave 1 wrap on the pipe so the weight isnt just on the tape.
DIY Hitting Matt like divot action or holy grail mat:
- 4x5 Remnant of https://synthetic-turf.com/products/...g-greens/np50/ (nylon 1/2 pile)
- 3/4" workout EVA mats (I had some left over from my basement gym). Something like: https://www.amazon.com/Prosource-Ext...va&qid=1634007 134&s=sporting-goods&sr=1-4
- 30"x36"x.093" Polycarbonate sheet: https://www.menards.com/main/doors-w...9107080507.htm
- 3m 90 spray glue (this just worked ok, contact cement might work better as this dries FAST): https://www.menards.com/main/paint/a...4114359&ipos=2
- 1" upholstery foam (cut to strips) https://www.hobbylobby.com/Fabric-Se...-14%22/p/36738
Here are images: https://photos.app.goo.gl/dURjuK9ZwEsmMu1P8
Screen, Motor, adapters, brackets:
It was way cheaper and just about as easy to make my own screen instead of ordering a sportscreen.
- Motor, remote, mounts $168.50 shipped: https://www.avoutlet.com/window-trea...ade-motor-kit/
- Options I added and are needed: a Remote, Charger: AM35-ES-PS, Rollease Bracket Adapter: 9012258 , 2" Rollease Tube Adapter: MTCRDR-35-2 , Add Brackets: Add RB380, Add Tube End Plug: RA2 & REP53 2", Shade Tape
- triple layer 10x10': https://onestopsimshop.com/collections/impact-screens
- 2" x 10ft EMT https://www.menards.com/main/electri...4446524507.htm
- splicing tape (basically 30mil thick rubber, its not even sticky) as a spacer since the motor parts are made for slightly smaller tube: https://www.menards.com/main/paint/a...4431020154.htm
Random stuff:
- Automarine carpet (velcro sticks to this): https://www.menards.com/main/floorin...4430622308.htm
- mesh tarp for sides and top: https://www.menards.com/main/tools/a...3586782&ipos=1
- velcro: https://www.menards.com/main/paint/a...4445732020.htm
- side rails: https://www.amazon.com/dp/B08P8HHZQZ...roduct_details
- side clips (take off the big ring): https://www.menards.com/main/window-...2425858&ipos=6
- shelf brackets with 2x4s to hold up the screen: https://www.menards.com/main/storage...6976478&ipos=2
Attaching the motor to the EMT:
- attach the plastic motor adapters to the motor brackets (crown and drive adapter MTCRDR-35-2) and end adapter
- Add splicing tape (about 3 layer) and duct tape to hold the splicing tape to the adapters
- measure how long the motor is on the EMT, mark the emt pipe
- Drill a hole in the emt
- insert motor into emt
- drill pilot hole through emt into drive adapter
- Add set screw through emt into drive adapter
Attaching the screen to the emt
- EMT pipe has a line down the side from when it was created, use it as your guide to apply the screen (double sided) tape.
- I ended up adding 3 rows of tape (not shown in pictures)
- Attach the fabric to the tape, then add a layer of duct tape as well. This should hold as long as you leave 1 wrap on the pipe so the weight isnt just on the tape.
DIY Hitting Matt like divot action or holy grail mat:
- 4x5 Remnant of https://synthetic-turf.com/products/...g-greens/np50/ (nylon 1/2 pile)
- 3/4" workout EVA mats (I had some left over from my basement gym). Something like: https://www.amazon.com/Prosource-Ext...va&qid=1634007 134&s=sporting-goods&sr=1-4
- 30"x36"x.093" Polycarbonate sheet: https://www.menards.com/main/doors-w...9107080507.htm
- 3m 90 spray glue (this just worked ok, contact cement might work better as this dries FAST): https://www.menards.com/main/paint/a...4114359&ipos=2
- 1" upholstery foam (cut to strips) https://www.hobbylobby.com/Fabric-Se...-14%22/p/36738


Comment