UK Retractable Garage Sim Build

Collapse
X
 
  • Time
  • Show
Clear All
new posts
  • stubious
    Member
    • Jan 2023
    • 34

    #1

    UK Retractable Garage Sim Build

    I'm in the planning / parts buying stage of my sim build, hoping to have it up and running by the end of the month, so thought I'd start a thread on it and share progress along the way.

    Constraints:
    • Space will primarily be used for parking the car - so limited chance to leave it up between uses.
    • I'm in the UK, so pre-fab solutions for rollers don't exist here
    • I'm trying to DIY where I can to save £ to put into quality where it matters (launch monitor, screen, cpu)
    • I've got 2.54m ceilings (8'4"), with a room above, so no chance of raising them, nor can I dig down. Seems being 5'8" is coming in handy beyond just fitting in economy class seats
      • I've got a matt already and can take full swings with my driver without hitting the ceiling. Will see how real ISS is for me once I get going - might be limited to irons, but I can live with that. Or just use my nearly 20 year old Calaway 460x driver and honestly not care if it is sacrificed to the gods
    • The double garage is decent sized (approx 5m x 5m) but there is a steel beam running across the middle, that drops the ceiling down too low to swing, so I'm hitting sideways across the garage

    Current plan:
    • Screen 40cm from wall (~16")
    • Hitting from approx 2- 2.5m from screen, though can move back further if helpful...
    • ...but I'll have a short throw Optoma at approx 1.8m from screen, so I worry about being too far behind it (if that ultimately is an issue, I can swap out for a BenQ)
    • Image at 4:3 ratio at 2.8m x 2.1m
    • Screen will be 2.4m or so height, but can't go any wider than 2.8m with my garage dimensions
    • Screen mounted to 2" steel tube, held up with steel wall brackets and mounted in pillow block bearings so I can roll it up (manually via chain, then can motorise if I care)
    • Curtains on sides on steel wire
    • Need to figure out padding or net for ceiling - probably padding as can't give net much distance to hang down with my heights (open to challenge here)
    Non-tech costs including premium screen from hybridme, mat, fasteners, various connectors, etc - coming in around £1,400 based on current parts list. Excludes launch monitor, projector, PC, software.


    A few images of the planned layout below - thoughts/questions/reactions/warnings all welcome!
  • stubious
    Member
    • Jan 2023
    • 34

    #2

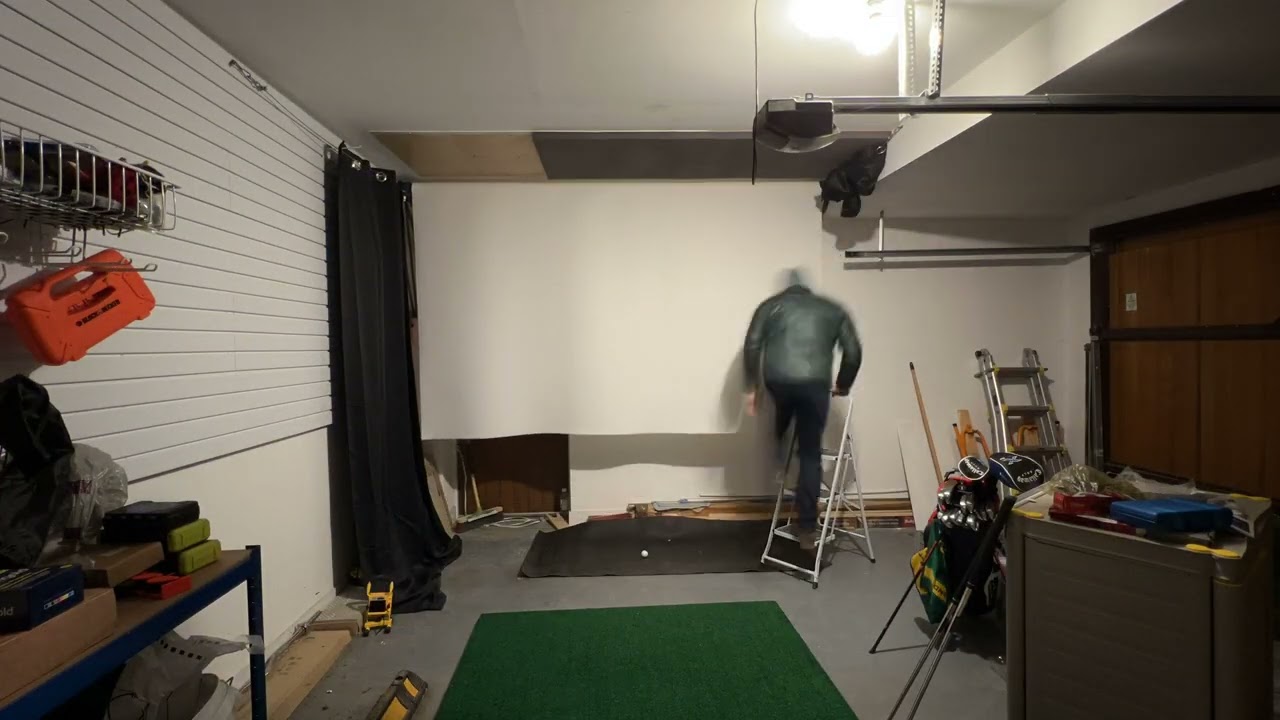
    Update with some progress and photos:

    I have the 2” steel tube inside the pillow block bearings (that wasn’t easy - clearly the tolerance on the steel tube dimensions was well out of line with the pillow block bearing!) and mounted to custom steel brackets I got on Etsy. Also attached a sprocket on one end so I can use a chain to raise/lower the screen as I still need to use the garage to park.

    I’m doing 3mm hardboard on the ceiling and will attach acoustic foam to it. That way I just have to repair screw holes down the road.

    I’m mid way through hanging curtains on the sides. Still need to get a good fit - pretty saggy with wire rope, may be fine or I might go with a ceiling curtain track

    on the screen, I tried tape to stick it to the steel tube (worked for some others) but I’ve got a thicker / more fabric feeling screen from hybridme here in the UK and tape didn’t work. Velcro is working (you can see the off cut test strip) so I’ll use that to attach things. But once on, I’ll have a few rolls always remaining on the pipe so the Velcro isn’t load bearing.

    Hoping to have it done by the end of the month, we will see!​
    Click image for larger version

Name:	IMG_1016 Large.jpg
Views:	1736
Size:	49.3 KB
ID:	384890Click image for larger version

Name:	IMG_0987 Large.jpg
Views:	1603
Size:	72.2 KB
ID:	384891Click image for larger version

Name:	IMG_1067 Large.jpg
Views:	1780
Size:	103.5 KB
ID:	384892Click image for larger version

Name:	IMG_0976 Large.jpg
Views:	1547
Size:	79.1 KB
ID:	384893Click image for larger version

Name:	IMG_0970 Large.jpg
Views:	1413
Size:	124.5 KB
ID:	384894Click image for larger version

Name:	IMG_0997 Large.jpg
Views:	1371
Size:	89.7 KB
ID:	384895

    Comment

    • stubious
      Member
      • Jan 2023
      • 34

      #3
      Update: Managed to get the screen up on the pole secured with velcro - though shouldn't need it as I never plan to unwrap it fully. But glad I had the velcro on there as when I tried to roll it down - the weight of the screen causes it to unravel fully! So I'm working on sorting out the gearing solution to raise/lower it with a motor, which will then keep it in the correct fixed position. Managed to hit a couple of 9 irons into it and got quite a bit of bounce back - but I think that is just because the weight of all the extra screen material (over a meter) bunched up on the ground was pulling it super tight. From looking at youtube videos with others that have the same screen, bounce back was pretty much non existent.

      So, a bit of an unplanned setback, but I think that's the nature of a DIY approach!​

      Click image for larger version

Name:	Screenshot 2023-02-20 at 18.33.40.jpg
Views:	1306
Size:	39.8 KB
ID:	385249Click image for larger version

Name:	Screenshot 2023-02-20 at 18.33.48.jpg
Views:	1205
Size:	60.9 KB
ID:	385250Click image for larger version

Name:	Screenshot 2023-02-20 at 18.33.32.jpg
Views:	1204
Size:	113.9 KB
ID:	385251Click image for larger version

Name:	Screenshot 2023-02-20 at 18.33.23.jpg
Views:	1210
Size:	96.4 KB
ID:	385252

      Comment

      • stubious
        Member
        • Jan 2023
        • 34

        #4
        Not done with the ceiling panels, netting isn't quite right yet and I need to figure out what i'm doing with the flooring at the front. But great progress!

        ​​​​https://youtu.be/YJF1zNUUIQs


        Click image for larger version

Name:	IMG_1261 Large.jpg
Views:	1165
Size:	48.2 KB
ID:	385526


        Click image for larger version

Name:	IMG_1282.jpg
Views:	1275
Size:	69.1 KB
ID:	385525

        Comment

        • stubious
          Member
          • Jan 2023
          • 34

          #5
          I redid the curtains on the side with ceiling track instead of the steel wire approach - I just couldn't get them to the right location to cover the bearings with the wire approach. Also finished installing the acoustic foam on the ceiling, mounted the projector and got some cheap 7mm turf that I can roll up easily and put away when parking the car. Might go with something a bit thicker eventually - and it looks cheap - but does the job from a bouncing perspective.

          I'm still working out the best way to secure the screen when down - but had some luck last night with a tarp clip and bungee to the wall on the left and a tarp clip and bungee to a 2.5kg weight on the right. After starting off with the screen too tight and having a wedge shot bounce back up and land on my head (wasn't going fast enough to do any damage - but would be a sure fire way to ruing my swing if I was always worried about bounceds!) - I moved the weight in some and think it will work.

          I'll probably do a couple of tarp clips on the bottom, with the screen rolled 8-10 inches under toward the back wall - just to keep the screen from lifting up a bit and getting out of place. And it may benefit from a clip or two on the left wall as well. For nothing other than sheer dumb luck the right side seems to naturally hang very straight.

          Launch monitor is arriving today - so can actually put this to use properly. I'm sure there will be plenty of adjustments - but I'm pretty pleased so far!

          Click image for larger version

Name:	IMG_1322 Large.jpg
Views:	1516
Size:	82.9 KB
ID:	385820

          Comment

          • VictoriousSecret
            Junior Member
            • Mar 2023
            • 2

            #6
            This is awesome. Looking to do almost the exact same thing for my garage. One question, how did you attach the sprocket to the bar?

            Comment

            • stubious
              Member
              • Jan 2023
              • 34

              #7
              VictoriousSecret - I used a taper block bush (https://www.bearing-king.co.uk/beari...MaAl0vEALw_wcB).

              Basically you get a sprocket that is fit for the specific size of taper block bush - and the two go together to create a tight clamp to the tube - this video is a good example: https://www.youtube.com/watch?v=-3K_vf_7fhM

              the big challenge I had was that the bushing is a very good tolerance to the 2" bore - but the mild steel tube was definitely not! A good mallet and some brute force got me there - and I probably could have cut a thin hacksaw-blade-width line into the pipe to give some flex to make it easier - but did have a moment of stress!

              happy to answer any questions / share specific part list or more detail if helpful, just let me know!

              Comment

              • VictoriousSecret
                Junior Member
                • Mar 2023
                • 2

                #8
                stubious If you wouldn’t mind sharing the list, that would be amazing. I just purchased the EMT pipe, pillow block bearings and am on the lookout for brackets and sprockets.

                It looks like you did indeed go with the motorization of the screen? Impressive!

                Comment

                Working...